BloodHound
1. Installation in the attacking machine
(C# and PowerShell Collectors)
BloodHound is a single page Javascript web application, built on top of Linkurious, compiled with Electron, with a Neo4j database fed by a C# data collector.
Download github repo from: https://github.com/BloodHoundAD/BloodHound.
Initialize the console:
Open the browser at the indicated address: http://localhost:7474/
The first time it will ask you for default user and password: neo4j:neo4j.
After loging into the application you will be prompted to change default password. We will use later this password to enter the Bloodhound tool.
2. Collecting data in the foothold machine
Upload and install the bloodhound binary into the foothold: releases.
2.1. Bloodhound.py
If bloodhound is already installed, you can run the bloodhound.py in the foothold machine:
2.2. Sharphound.exe
Sharphound is the official data collector for BloodHound.
We run the SharpHound.exe collector from the attack host (our foothold).
3. Using bloodhound
In our attacker machine we had launched the neo4j database. Now we need to launch bloodhound, and import the generated by the collector files to be interpreted.
Move the json files to where you have your blodhound tool installed. Open bloodhound, we should have the BloodHound GUI tool loaded with a blank slate.
Now, we upload the data. We can either upload each JSON file one by one or zip them first with a command such as zip -r ilfreight_bh.zip *.json and upload the Zip file. We do this by clicking the Upload Data button on the right side of the window.
Along with the Analytics tab, we can do some custom Cypher queries.
Find Computers with Unsupported Operating Systemsis great for finding outdated and unsupported operating systems running legacy software.Find Computers where Domain Users are Local Adminto quickly see if there are any hosts where all users have local admin rights.
We can also type domain: in the search bar and select one.
Enumerate Remote Desktop Users Group
In Bloodhound, we can use this Cypher query and add it as a custom query:
Enumerate SQL Server Admin
Enumerate via Bloodhound and the SQLAdmin edge. We can check for SQL Admin Rights in the Node Info tab for a given user or use this custom Cypher query to search:
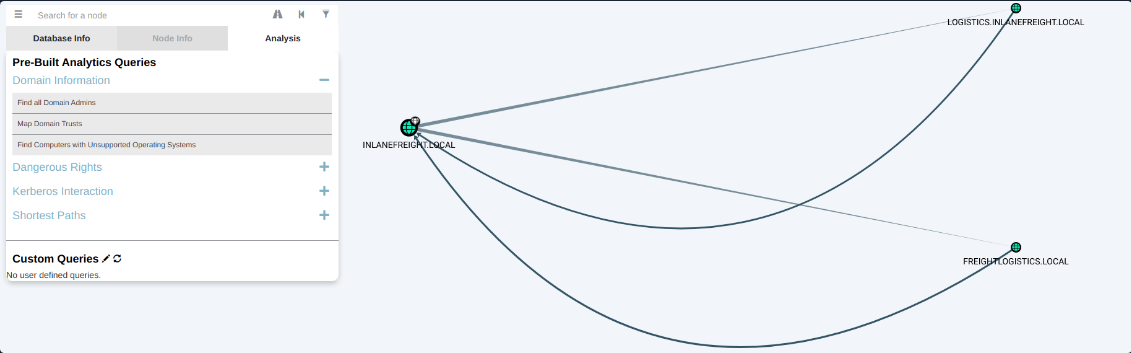
Visualizing Trust Relationships in BloodHound
4. Bloodhount queries for ALL
https://queries.specterops.io/
Last update: 2026-03-30 Created: May 9, 2023 17:16:52